Many businesses don't run on one QuickBooks Online company. A property owner might keep each building in its own LLC. A restaurant group might have one company per location. And a bookkeeper or accountant might pay bills in a dozen clients' books every week.
Every one of those companies pays vendors. Every one of those vendors wants to know which invoices a payment covers. This guide shows how to send remittance advice for all of them from one login.
The Problem: One Company at a Time Doesn't Scale
QuickBooks Online's own remittance advice is manual. It works one bill payment at a time, and only for bill payments. Payments recorded as checks or expenses, which is how many ACH and wire payments end up in QuickBooks, aren't covered. We cover the details in our guide to emailing remittance advice in QuickBooks Online.
With one company, that is tedious. With several, it gets worse:
- A login for each company. You sign out of one company, sign in to the next, and repeat. It is easy to lose track of where you are.
- Manual emails for every payment. Someone copies invoice numbers and amounts into an email, vendor by vendor, company by company.
- Mix-ups between companies. The wrong logo, the wrong reply-to address, or a payment from one entity sent from another's email settings.
- Nothing goes out on its own. If nobody remembers, the vendor calls to ask what the deposit was for.
The fix is one login that can see every company, keeps each one separate, and sends remittance advice for each of them automatically.
Step by Step: Add and Manage Several Companies
Remittance-Advice.com lets one login manage several QuickBooks Online companies. The account owner sets it up. Here is how:
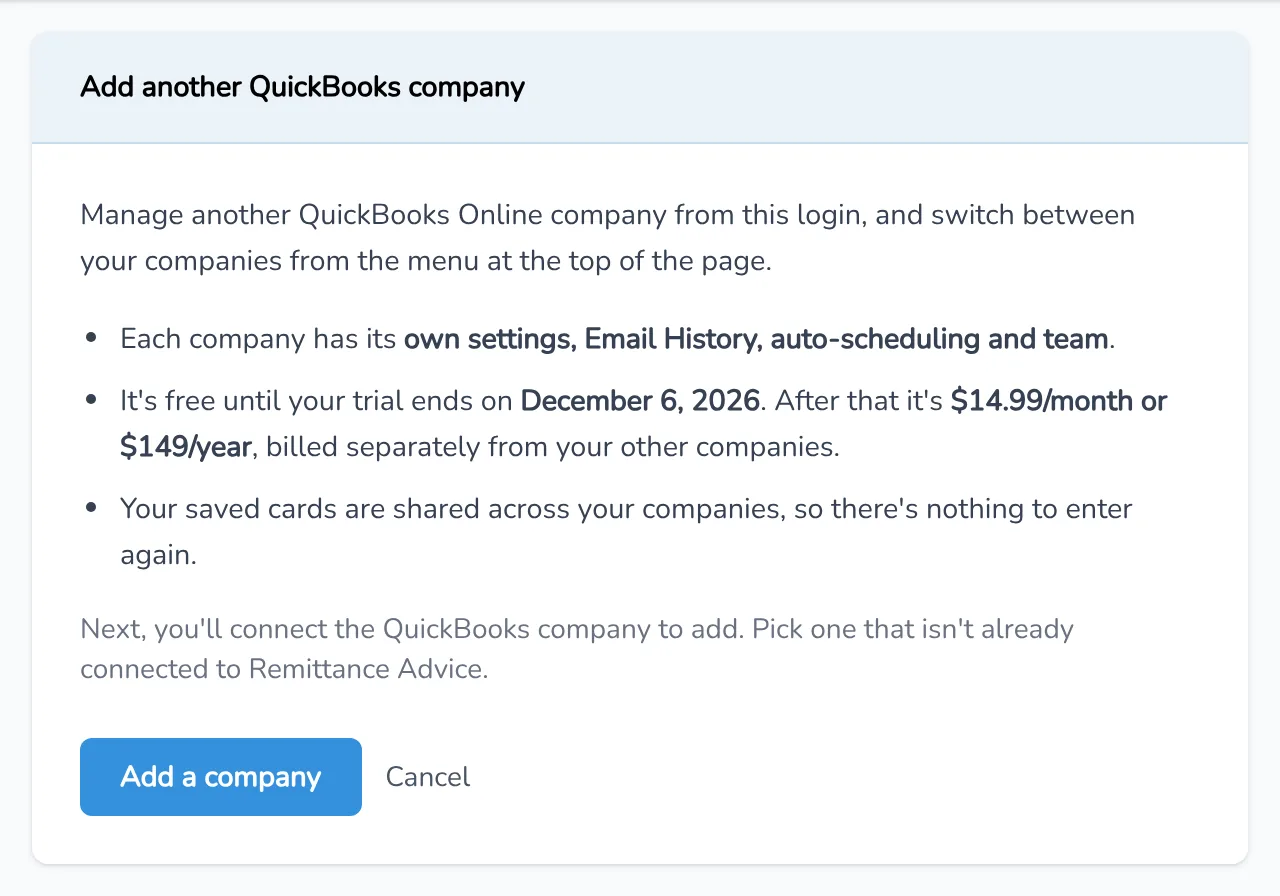
Click Add another company
Log in to your Remittance-Advice.com account and go to Settings → QuickBooks. Under Your QuickBooks Companies, click Add another company. You can also find it at the bottom of the company menu.
Connect that QuickBooks Online company
Click Add a company, then connect the QuickBooks Online company you want to add, the same way you connected your first one. Pick a company that isn't already connected to Remittance Advice.
Switch companies from the company menu
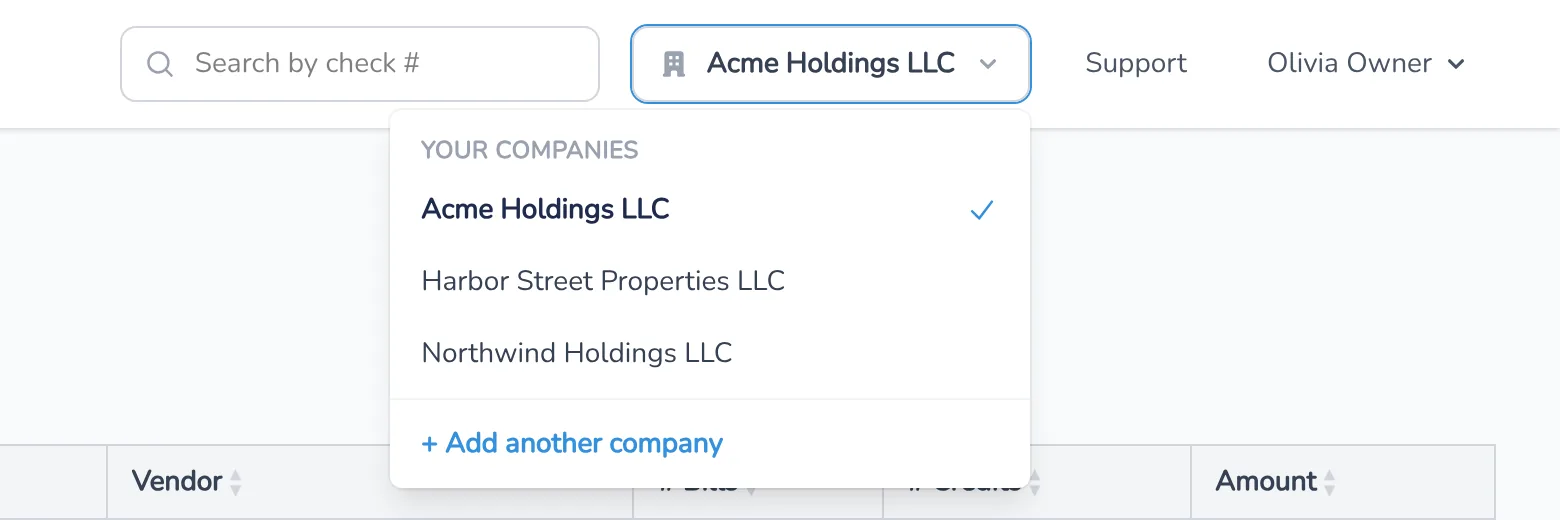
The company menu sits at the top of the app, next to Support. It shows the company you're working in. Click it and pick another company to switch. No logging out and back in.
Turn on auto-scheduling for each company
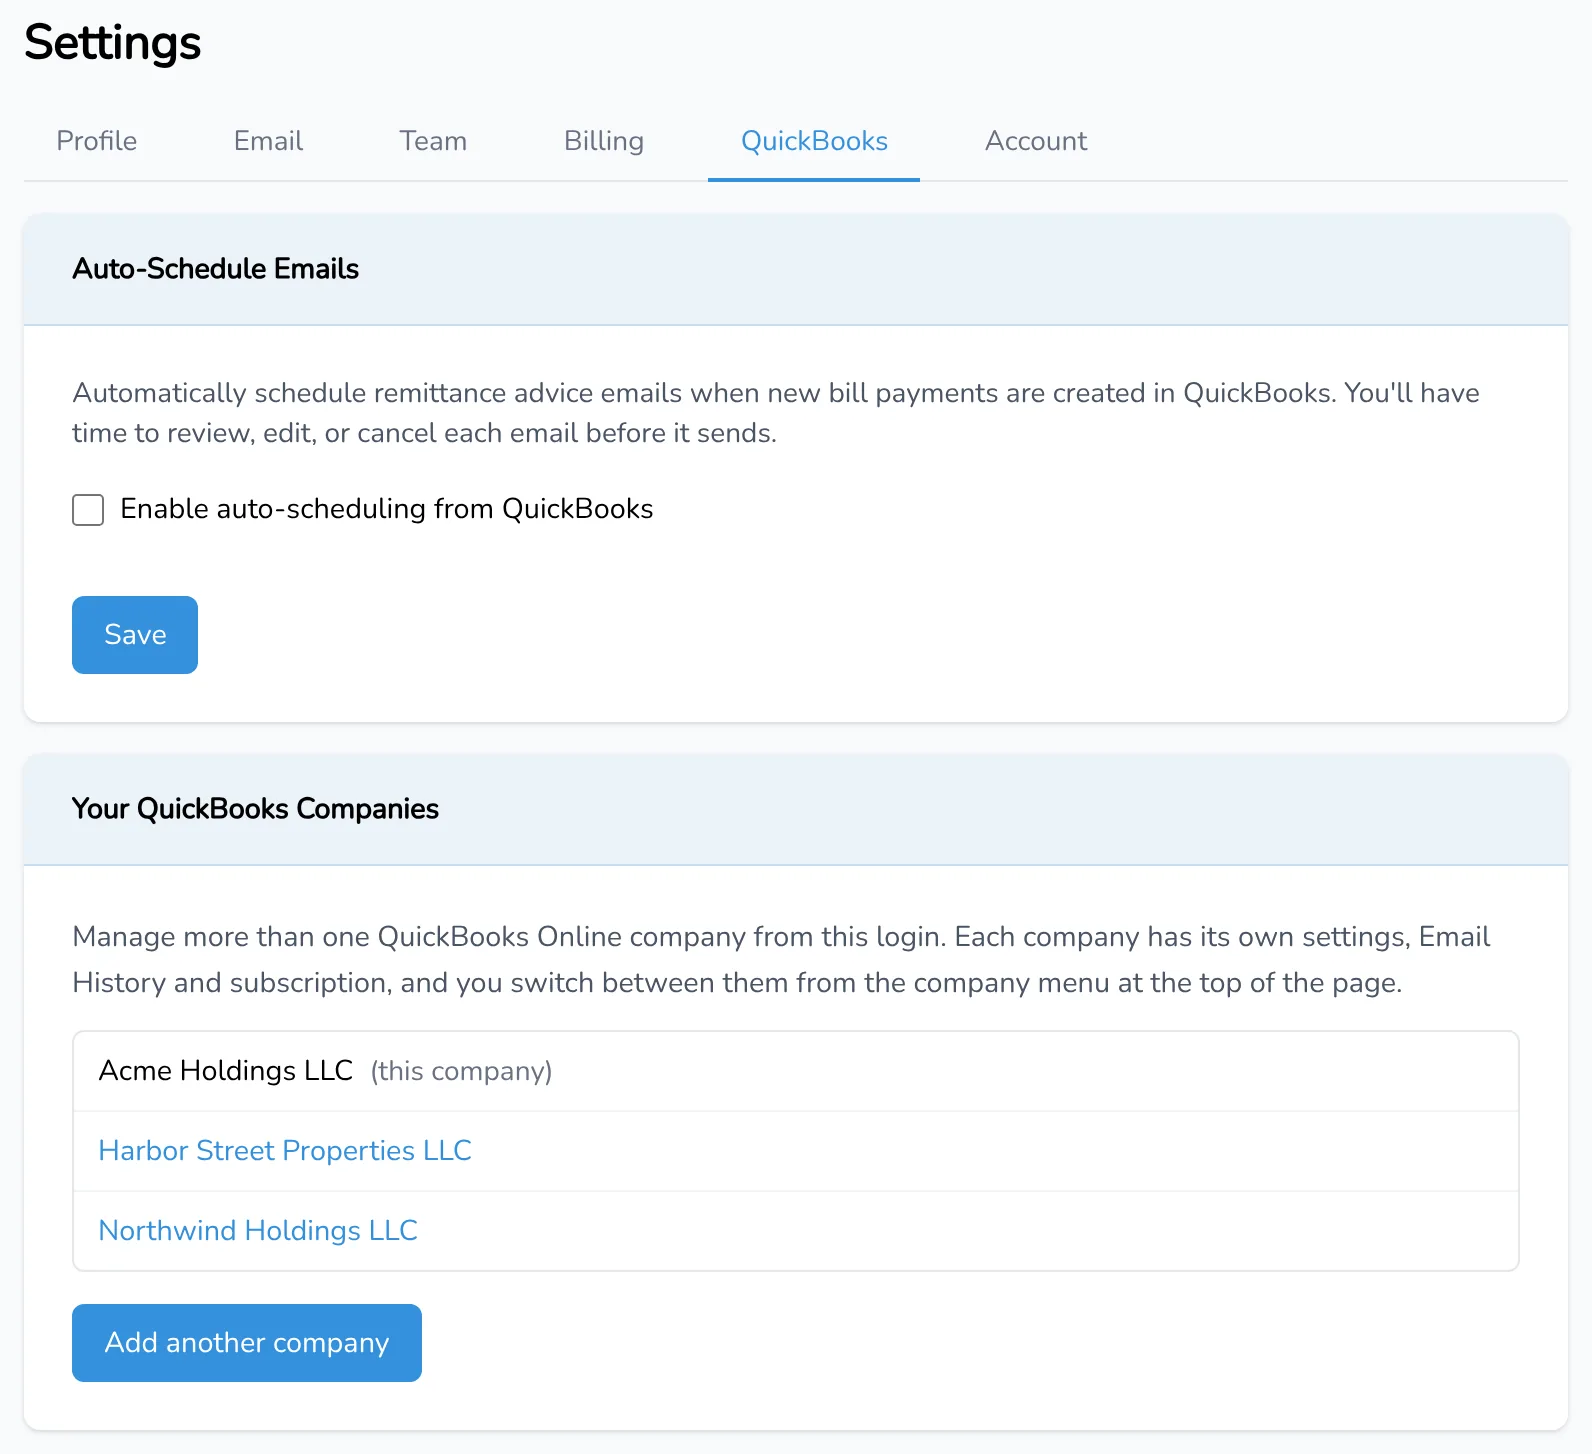
In each company, go to Settings → QuickBooks → Auto-Schedule Emails and turn it on. Remittances then go out to that company's vendors on the payment date, so you don't have to log in to each company. You can still review, edit or cancel each email before it sends. Learn more in our guide to scheduling remittance emails.
Nothing mixes between companies
Each company keeps its own QuickBooks connection, logo, email settings, columns, Email History and auto-scheduling. A payment from one entity is always sent with that entity's settings.
For Bookkeepers and Accounting Firms
If you manage clients' books, each client gets its own company in the app. Your staff don't need a separate login for each one.
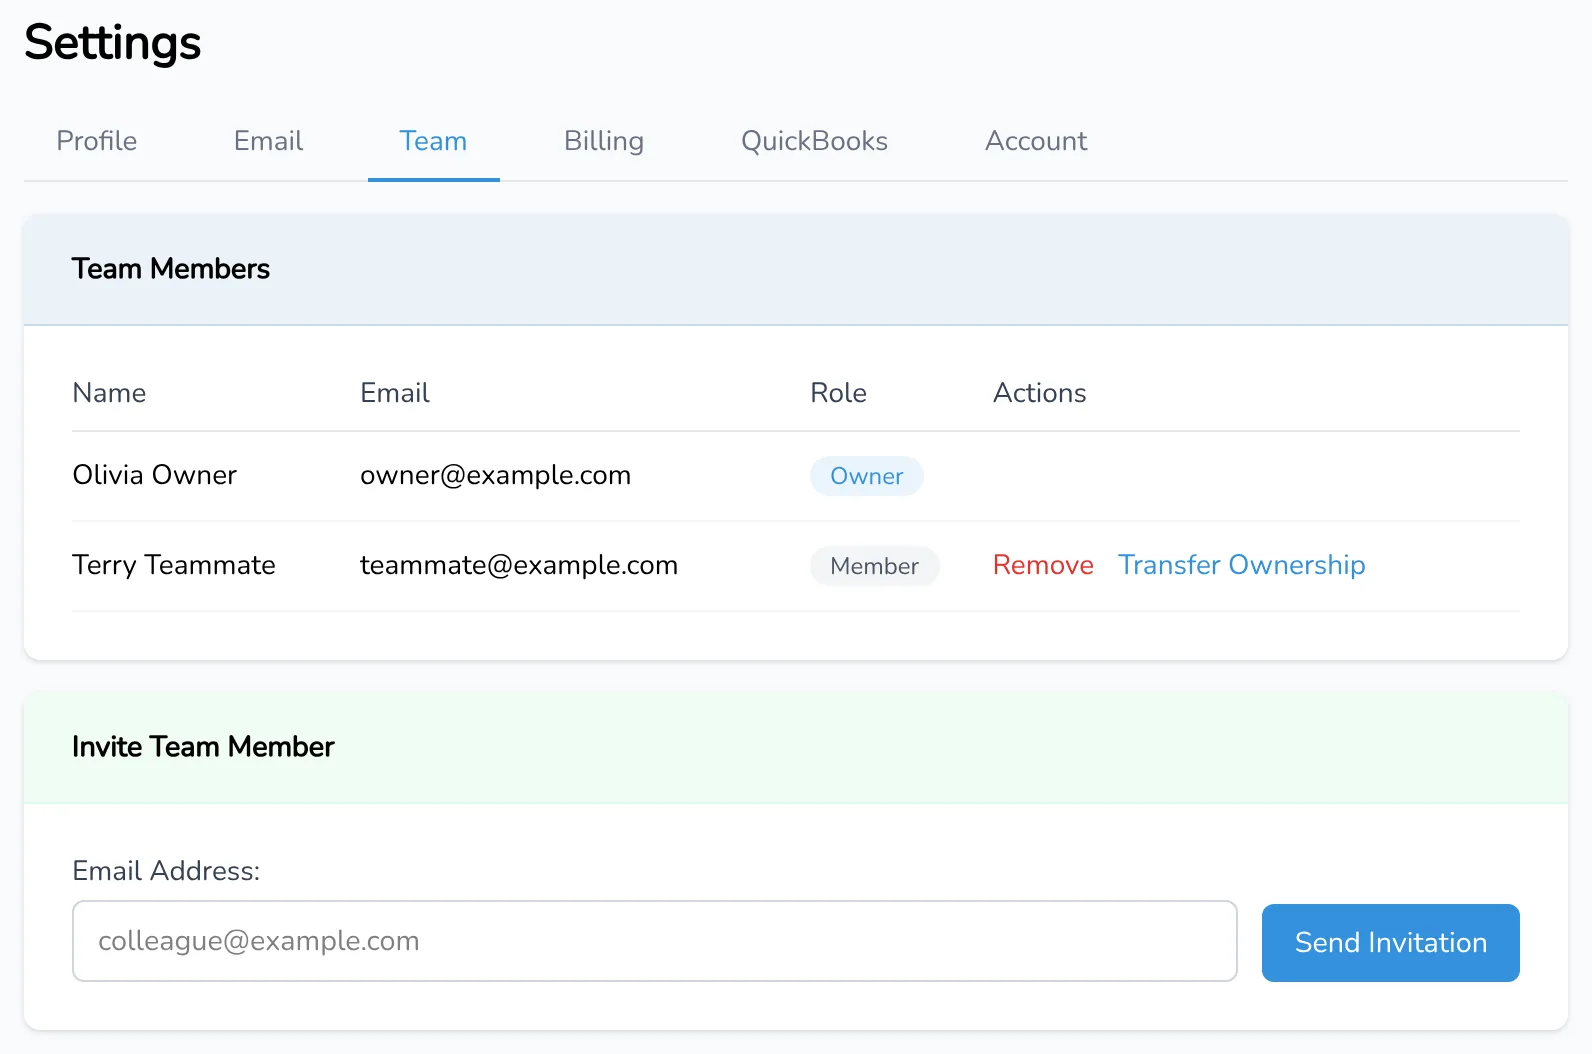
- One login for your staff. Invite a staff member from Settings → Team in each client company they work on. They use one login for all of them and switch from the company menu.
- Access for a client's own staff. Invite someone on the client's team to just their company. They won't see your other clients.
- Separate settings per client. Each company keeps its own QuickBooks connection, logo, email settings, columns, Email History and auto-scheduling.
- Remittances without logging in. With auto-scheduling on, each client's vendors get remittance advice on the payment date.
There's more for firms on our page for bookkeepers and accountants.
Pricing
Each company has its own subscription:
- Your first company: $249/year (about $20.75/month, 2 months free), or $24.99 billed monthly, with a 14-day free trial.
- Each additional company: $149/year (about $12.42/month), or $14.99 billed monthly, billed separately for each company.
Companies you add during your trial are free until it ends. They share your trial and don't get a new one. Your saved cards are shared across your companies, so there's nothing to enter again. Because each additional company is billed separately, it's easy to pass the cost through to that client.
See the multiple companies FAQ on our Support page.
What If You Stop Working With a Client?
Switch to that client's company with the company menu. Then go to Settings → Account and, under Remove This Company, click Remove. The confirmation lists what will happen before you remove it. Its subscription is canceled, so you won't be charged for it again. Your other companies aren't affected.
Only the account owner can add or remove companies
Adding and removing companies are owner-only settings. Teammates can work in the companies they've been invited to, but they can't add new ones or remove them.
Ready to manage every company from one login?
Connect your first QuickBooks Online company in a few minutes. Start your free trial today.
Start Free TrialGetting Started
- Create a free account — no credit card required, 14-day free trial.
- Connect your first QuickBooks Online company.
- Go to Settings → QuickBooks, click Add another company and connect the next one. Repeat for each company. (Or choose Get App Now in the QuickBooks App Store and pick the company: it's added and connected in one step.)
- Turn on auto-scheduling in each company, and invite your team from Settings → Team.
That's it. Every company's vendors get remittance advice, and you switch between companies from one menu.